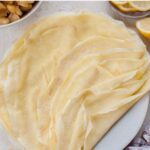
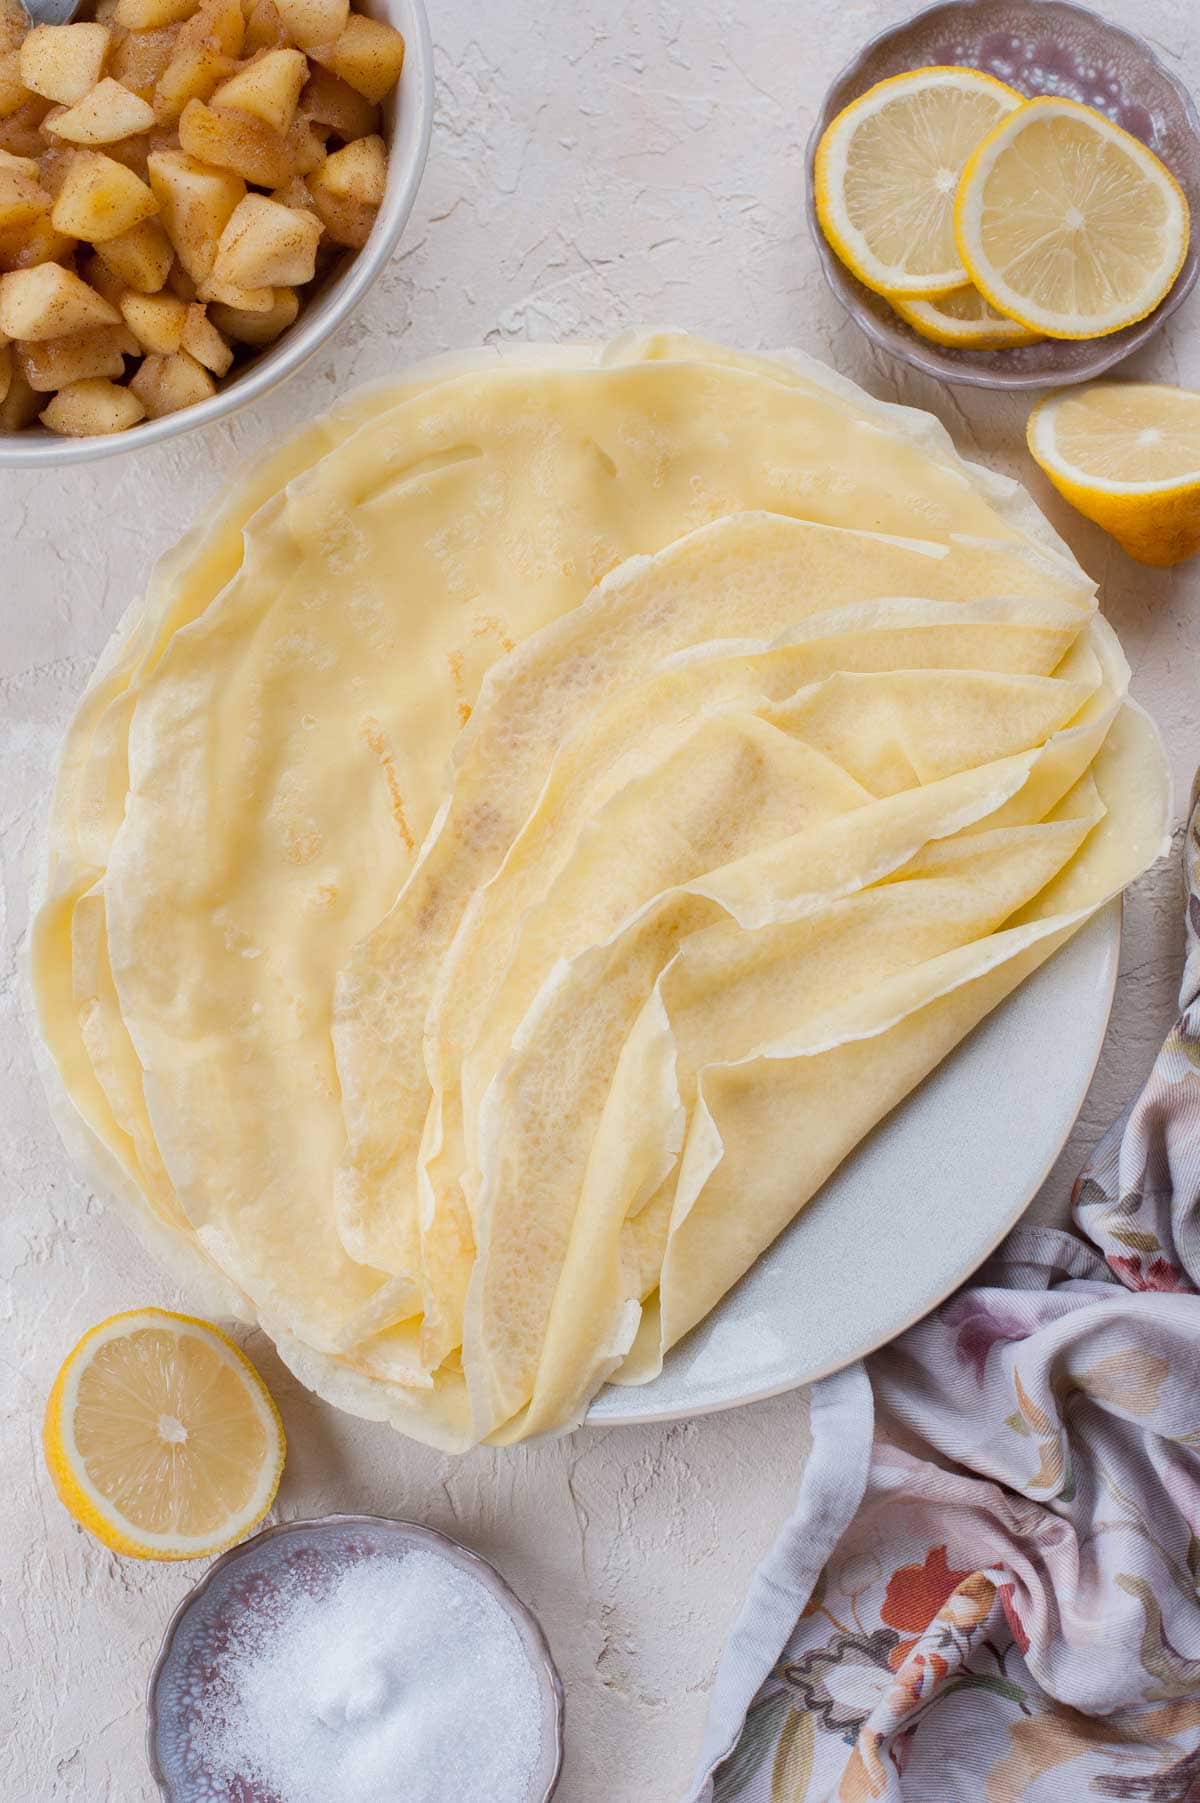
This is the best crepe recipe! They come out thin, soft in the middle, and slightly crunchy at the edges. They are easy to cook and flip over. Contrary to popular belief, crepes are really easy to make! Fill them with sweet or savory filling for a delicious breakfast or dessert. Learn how to make perfect crepes with this helpful tutorial and a video.
A delicious variation of the traditional crepes are these chocolate crepes.
What are crepes?
Crepes are thin and delicate French pancakes. They can be sweet or savory and be filled with many different kinds of fillings.
What is the difference between crepes and pancakes? The crepe batter is much thinner than the pancake batter. No leavening agents (baking powder or baking soda) are used, so they are completely flat instead of thick and fluffy. They taste similar, though!
Crepes are very popular throughout Europe, not only in France. Very similar to this French delicacy are British crepes, German crepes (Pfannkuchen), Austrian crepes (Palatschinken), and Polish crepes (naleśniki).
Ingredients
I’ve long searched for the perfect ingredient ratio for crepes. It really makes a difference! My perfect crepes are thin, easy to turn over, soft, and easy to roll up but also have crispy thin, lacy edges.
Here’s what you need to make perfect crepes:

Flour – I used plain all-purpose flour. I haven’t tested this recipe with other flour types.
Eggs – 3 large eggs make the crepes more elastic and easier to turn over. The eggs bind the dough together but also make them more chewy. This recipe will also work with 2 eggs but I prefer it with 3 eggs as the dough is so much easier to cook and flip over.
Milk – I used cow’s milk but you can also use any plant-based milk, like almond or oat milk.
Butter – butter added to the crepe batter makes them more soft, delicious, and easier to turn over. It also prevents them from sticking to the pan. You can also use unrefined melted coconut oil or vegetable oil instead (the same amount). The best flavor will be with butter.
Sugar – you can use any type of sugar: white sugar, brown sugar, coconut sugar, or other sugar alternatives like xylitol. If you’re making savory crepes you can omit it or add just 1/2 teaspoon.
Salt – a pinch of salt enhances the sweetness.
What you could also add:
- for sweet crepes, you can add vanilla extract, grated orange zest, or cinnamon to the batter
- for savory crepes, you can add some dried herbs, and grated Parmesan cheese to the batter and season it with salt and pepper
How to make crepes step by step
Making homemade crepes is really so easy!
One thing before you start:
How to measure flour: if you use a kitchen scale to measure out all the ingredients, it all goes easy breezy! But if you’re using measuring cups, remember that 1 cup of flour can weigh 120-150g, depending on how you’re filling your cup. Don’t scoop the flour directly into the measuring cup, which can compact it! 1 cup of flour in my recipes weighs 125g. To correctly measure the flour, you need to:
- Fluff the flour by stirring it in the bag/flour container with a spoon.
- Spoon the flour and sprinkle it into your measuring cup.
- Sweep off the excess flour with the back of a knife.
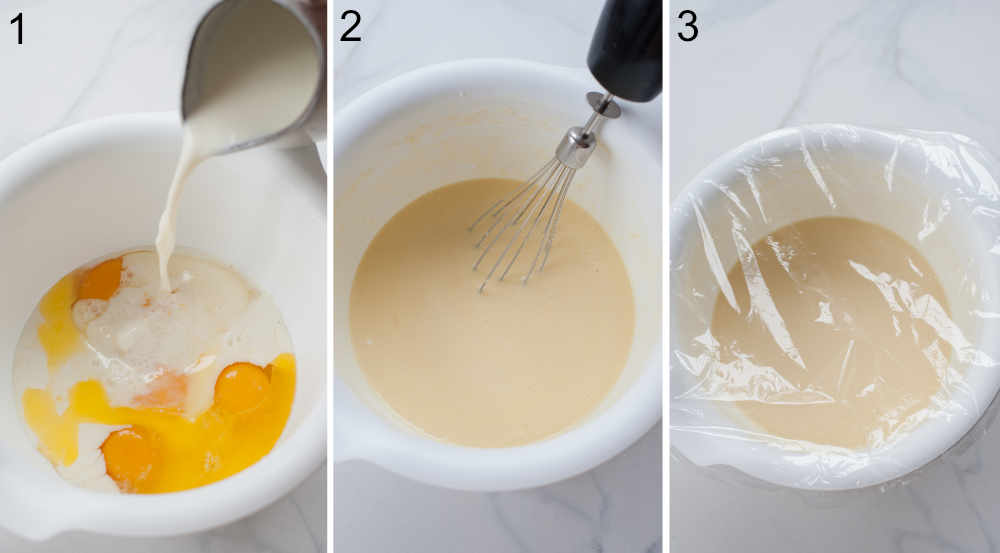
STEP 1: Prepare the crepe batter
Simply mix all the ingredients until combined. You can use a blender, hand mixer, immersion blender (hand blender), food processor, or even whisk it by hand (using a whisk).
I prefer to use a hand blender (immersion blender) – it’s the quickest way to mix the ingredients and the batter is more smooth.
A stand blender is also a good option but there’s more to wash and sometimes the flour can get stuck around the blades (this will probably vary depending on the brand). If you whisk the batter by hand it will have small lumps, but this is also ok and your crepes will be fine.
STEP 2: Leave the batter to rest
Cover the bowl with plastic foil or a kitchen cloth and leave it on the counter for about 30 minutes.
Does crepe batter need to rest? This is optional. Contrary to popular belief, it is not necessary to rest the crepe batter. You can cook them straight away but leaving the batter to rest keeps crepes soft and makes cooking them a little bit easier – they are more elastic and less prone to break (the difference is not huge but if you’re struggling with cooking crepes, leave them to rest). In terms of flavor, it changes nothing. I often cook my crepes right away but since you often need to make the filling, you can leave the batter to rest while you’re preparing the filling.

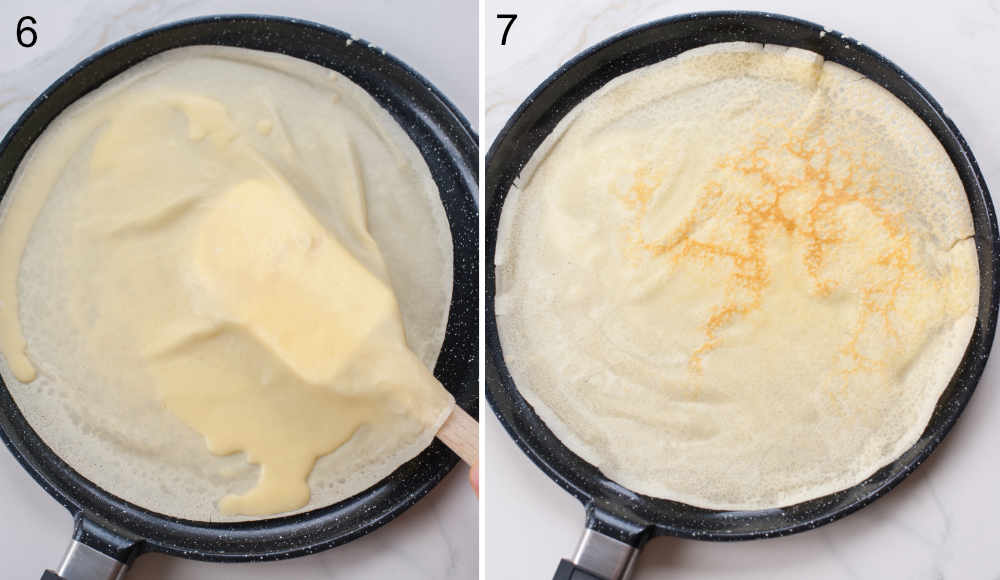
STEP 3: Cook the crepes
- Brush the pan with a small amount of butter (about 1/2 teaspoon) and heat it over high heat. You can brush the pan with butter between each crepe or just before the first crepe. I prefer to use butter before cooking each crepe. The pan should be well heated.
- Holding the pan in one hand (it shouldn’t be on the burner) and the bowl or blender jar in the other, pour in a small amount of batter, tilting and swirling the pan simultaneously until the batter evenly coats the bottom of the pan. Place the pan on the burner and cook for about 30 seconds.
- When the edges of the crepe look dry and lacy and its bottom is golden brown, it’s ready to be turned over.
- Loosen the edges of the crepe with a flexible silicone spatula. Slide the spatula under the crepe, make sure it doesn’t stick to the pan, and flip it over.
- Cook on the other side just briefly, for about 10 seconds, until set. Transfer on a plate. Repeat with the remaining batter.
Cooking temperature: I’m cooking my crepes over high heat but this can be different for you and it depends on what kind of stovetop you have and also what kind of pan you have. If your stovetop is very powerful, you may need to cook crepes on medium or medium-high heat. The general rule is that these pancakes are very thin so they need to be cooked very quickly but if your crepes come out burned, reduce the temperature. Cooking time can also be different for you – it will depend on the temperature of the burner and the type of your pan.
How to keep the crepes warm: Pile your crepes onto a pie plate and cover them with foil to keep them warm. You can also keep them in an oven preheated to the minimum temperature until you’re finished cooking all the batter.
What kind of pan is best for cooking crepes: These pancakes are very thin and delicate so it’s necessary to use a non-stick pan. Really any non-stick pan/skillet will do but the best is a pancake pan! If you love making any kind of pancakes or fritters you will be happy with the purchase. This pan has low rims which makes flipping any kind of crepes/pancakes/fritters much easier (the pan is shown in the photos and in the video).
Crepe filling ideas
You can fill your crepes with sweet or savory fillings. Here are some crepe filling ideas:
Sweet filling ideas:
- lemon sugar crepes: sprinkle them with granulated or caster sugar and squeeze over some lemon juice – so delicious
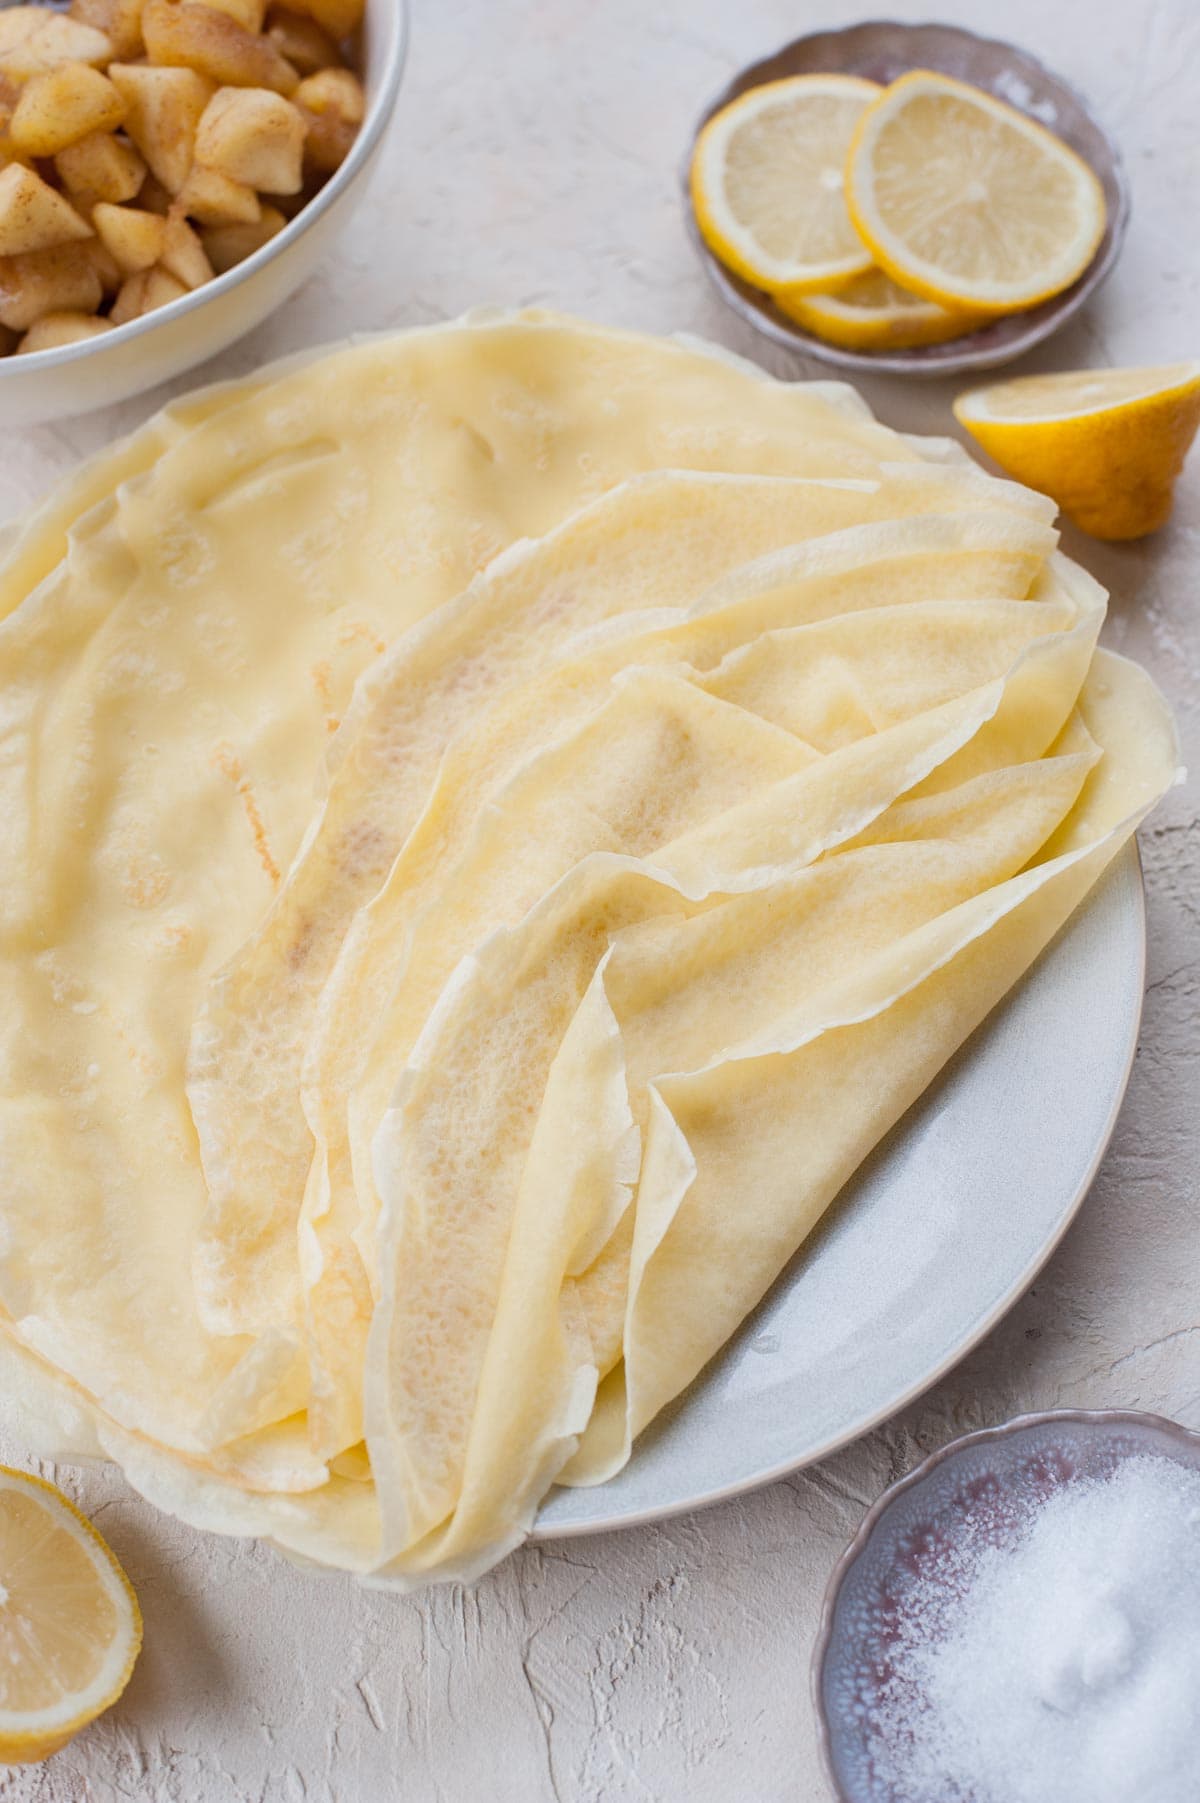
- apple crepes – filled with sauteed cinnamon apples
- Nutella + strawberries or Nutella + bananas
- strawberries and cream (fresh strawberries and whipped cream)
- jam
- lemon curd (or passion fruit curd) and blueberries
- cream cheese filling (cream cheese + sugar + vanilla extract)
- whipped cream cream cheese filling (cream cheese + powdered sugar + vanilla + whipped cream) – this is the filling shown in the video
- sweet vanilla cottage cheese and raspberry sauce (check out this chocolate crepes recipe)
- peanut butter and jelly or peanut butter and banana
- sweet farmer’s cheese filling
Savory filling ideas:
- smoked salmon + herbed cream cheese + honey mustard sauce (recipe here: smoked salmon crepes)
- spinach + sun-dried tomatoes + feta cheese
- ham + cheese + egg
- roasted veggies or sauteed veggies (like ratatouille – check out this cheesy vegetable crepes recipe)
- pesto + chicken + mozzarella + basil
- mushrooms + onions + spinach + Gruyere cheese (mushroom crepes)
- crepes with ham, cheese, and eggs
How to fold crepes
- fold them in half – quesadilla-style or omelet-style, I like to do that especially for savory crepes, when the filling is kind of chunky
- fold them into triangles
- roll them up
- make a crepe cake – spread the crepes with a filling without folding them at all, then stack them up high to form a cake that can be sliced into wedges
Here’s an article with detailed instructions and step-by-step photos showing how to fold crepes.
Storage
How to store crepe batter: Can crepe batter sit overnight? Yes, the crepe batter can be made ahead. Store it in the fridge for up to 24 hours, whisk well before using.
How to store cooked crepes: Layer each crepe between parchment paper (to keep them from sticking to each other), then wrap the whole stack tightly in plastic wrap and put it in the fridge. If they’re not wrapped properly they will dry out and be crumbly.
The crepes can also be stored in a stack without parchment paper in between (make sure they are tightly wrapped in plastic foil) but they can be a little harder to separate – leave them on a counter for a while until they are not cold anymore, then separate them and reheat.
How to warm up crepes: Reheat them on a dry non-stick pan until warm or in a microwave.
How to reheat filled crepes: Melt some butter in a pan. When the butter is hot and bubbling, add the crepes and cook briefly on both sides until warm and lightly golden.
How to freeze crepes: layer each crepe between parchment paper and wrap in plastic foil, then freeze for 2 months. Thaw in the fridge then reheat in a pan or a microwave.
Top tips for success
- My best tip: use a non-stick pan and a flexible silicone spatula. These are essential to making great crepes!
- For the best results use a blender to prepare the batter. It’s the quickest way to mix the ingredients and yields the smoothest batter. I prefer a hand blender over a stand blender.
- Let the batter rest – this is optional but makes cooking crepes a little bit easier (they hold together better and are less chewy).
- The pan should be well heated. If your pan is not hot enough, your pancakes may stick to the pan and tear.
- Butter the pan before the first crepe and optionally between each crepe (I prefer the latter).
- Cook them over medium-high or high heat (this will depend on your burner). Generally, these thin pancakes cook very quickly, cook them only until set and not for too long or they will be tough.
- Swirl and tilt the pan immediately after pouring in the batter to get a thin crepe.
- Don’t flip them too soon so they won’t tear.
- If you’re already a crepe pro, you can try cooking them on two pans simultaneously!
FAQ / Troubleshooting:
They have been cooked for too long. Crepes cook very quickly, cook them only until set and still soft.
The temperature was too high, try to reduce it and cook them a little bit longer.
It should be like heavy whipping cream.
You’ve tried to flip them over too early or the pan was not hot enough.
The batter is set and doesn’t look wet, the edges of the crepe are dry and lightly browned, the bottom of the crepe is lightly browned.
The batter was not rested or was overmixed.
Did you make this recipe? RATE THE RECIPE or tell me in the COMMENTS how you liked it! You can also add a photo of your dish. It would make me very happy and will help other readers. Thank you!!
How To Make Crepes (Best Crepe Recipe!)

Ingredients
- 1 cup (125g) all-purpose flour spooned and leveled
- 1 ¼ cups (300g) milk
- 3 large eggs
- 2 tablespoons sugar
- 2 tablespoons melted butter or vegetable oil
- pinch of salt
Would you like to save this?
Instructions
- Prepare the crepe batter: Simply mix all the ingredients. You can do that with a blender, hand(immersion) blender, hand mixer, food processor, or even by hand (with a whisk). I prefer to mix the batter with a hand blender – it's the quickest way to mix the ingredients and the batter is more smooth. If you’ll whisk the batter by hand it will have small lumps, but this is also ok and your crepes will be fine (try to add flour gradually while you are whisking).
- Leave the batter to rest: Cover the bowl with plastic foil or a kitchen cloth and leave it on the counter for about 30 minutes. This is optional but it makes cooking crepes a little bit easier.
- Cook the crepes:
- Whisk the crepe batter before using. Add a small amount of butter (about 1/2 teaspoon) to a non-stick skillet/pancake pan and heat the butter over medium heat (high heat if you don’t have a powerful stovetop) until it’s melted and the pan is well-heated. Spread the butter with a spatula all over the pan.
- Keeping the pan in your left hand (not on the burner) and the bowl with batter in your right hand, pour a small amount of batter into the pan, tilting and swirling the pan until a thin layer of batter coats the bottom of the pan. You can also pour in the batter with a measuring cup (1/4 cup) or with a ladle if that’s more convenient for you, although the amount of batter needed will vary depending on the size of the pan.
- Cook the crepe for about 30 seconds or until the edges are looking dry and the bottom is light brown (lift the crepe with a spatula to check).
- Loosen the edges of the crepe with a flexible silicone spatula (making sure it's not sticking to the pan), slide the spatula under the crepe, and flip it over.
- Cook on the other side just briefly, for about 10 seconds, until set. Transfer to a plate. Repeat with the remaining batter (I like to butter the pan between each crepe, but you can also use it just before the first crepe).
- Enjoy!
Notes
- Cooking temperature: it will depend on how powerful your stovetop is. If your stovetop is quite powerful, cook them over medium heat. If it’s not, cook them over high heat.
- Ingredient notes:
- you can use any milk, also plant-based milk
- instead of butter, you can use coconut oil or other vegetable oil such as canola oil
- sugar – you can use any type of sugar: white sugar, brown sugar, or sugar alternatives such as xylitol. If you’re making savory crepes you can omit it or add just 1/2 tsp
- How to store crepe batter: you can store it in the fridge for up to 24 hours, whisk well before using.
- How to store cooked crepes: Crepes reheat well. Layer each crepe between parchment paper (to keep them from sticking together), then wrap the whole stack tightly in plastic foil. If they’re not wrapped properly they will dry out and be crumbly. Reheat them in a dry non-stick pan until warm or in a microwave. Crepes can be also stacked on each other without the parchment paper in between but you need to leave them on the counter for 15-30 minutes to warm up – they will be easier to separate and less prone to tearing.
- How to measure flour: Fluff the flour by stirring it in the bag/flour container with a spoon. Spoon the flour and sprinkle it into your measuring cup. Sweep off the excess flour with the back of a knife.
- Calories = 1 crepe (1/9 of the recipe). This is only an estimate!
- The recipe yields 9 (9-inch/23cm) crepes.

2 Comments
MARIIA
2 January 2021 at 10:55Hello Aleksandra and happy new year! I have just tried these crepes and I am almost thrilled as these are the best crepes I have done so far. They are just perfect: thin, with a somewhat creamy taste probably because of the butter, not dry and look gorgeous on the plate. At first I was a bit doubtful of the result since the batter seemed to be too thin but it worked just alright.
I used the basic recipe and did not change anything and left the batter to rest for 30 minutes. Thanks again!
P.S. was just wondering whether you might have also a recipe for galettes? This buckwheat pancakes.
Aleksandra
2 January 2021 at 13:09Hi Maria, Happy New Year to you, too! Thanks for trying out my recipe, I’m glad it worked out! I don’t have a recipe for galettes yet, but it’s definitely on my to-do list!