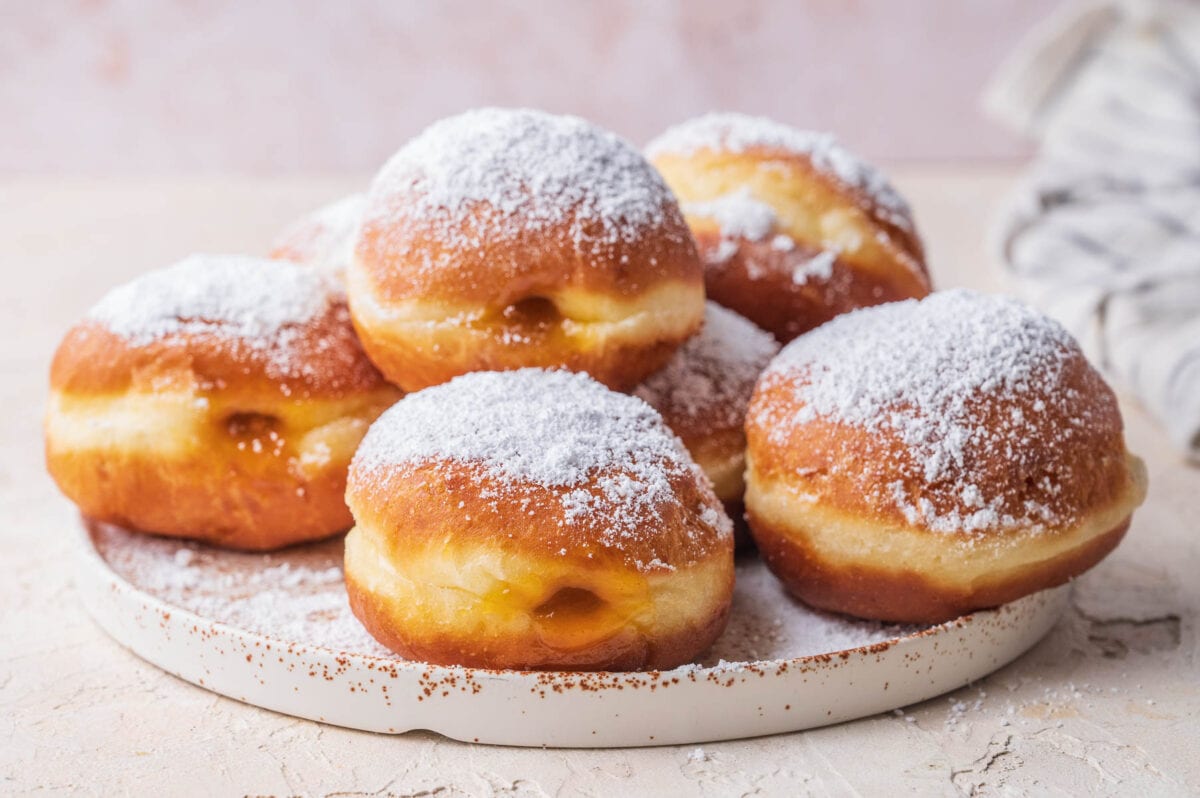
Krapfen are fluffy donuts filled with jam that are popular in Austria and Germany. They are made with yeast-based dough and deep-fried until golden and crispy on the outside. They are really easy to make and taste wonderful!
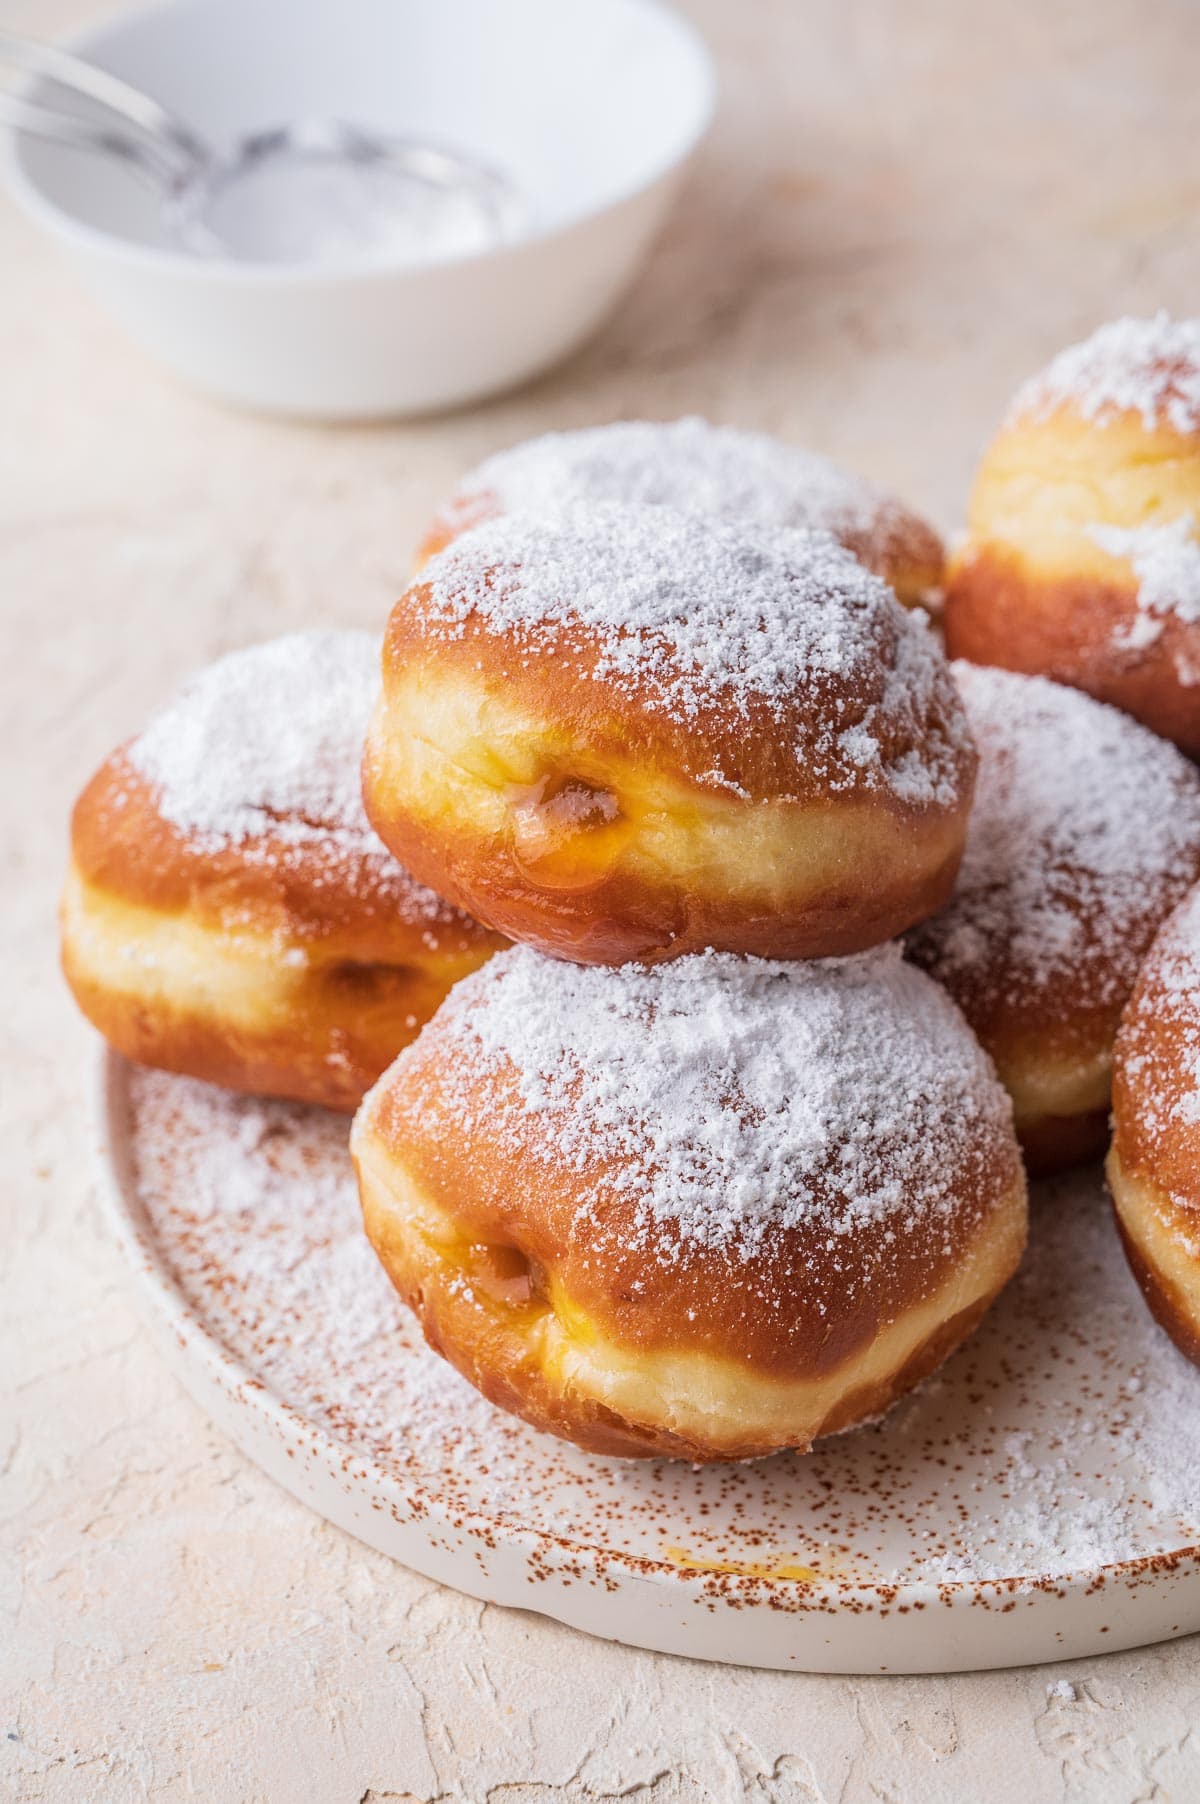
Krapfen or Berliner?
If you are confused by the name ‘Krapfen’, it’s possible you know these German donuts as Berliner. They are popular in all German-speaking countries. They are called Krapfen in Austria and southern states of Germany, and Berliner/Pfannkuchen/Berliner Pfannkuchen/Kreppel in the northern states of Germany. This may seem, again, confusing, because is some parts of Germany, Pfannkuchen also mean German crepes when they are clearly not the same thing.
The word Krapfen is the same for singular and plural version (so it’s one Krapfen and 10 Krapfen). Here’s how to pronounce Krapfen.
In Austria, they are sometimes called Faschingskrapfen because they are most often eaten during Fasching time but they can also be easily found in every grocery store or bakery all year round. Fasching is equivalent to Mardi Gras in the US and proceeds the Lent time.
The difference between Krapfen and American donuts is mainly the lack of the hole. Krapfen are also more chewy and bigger.
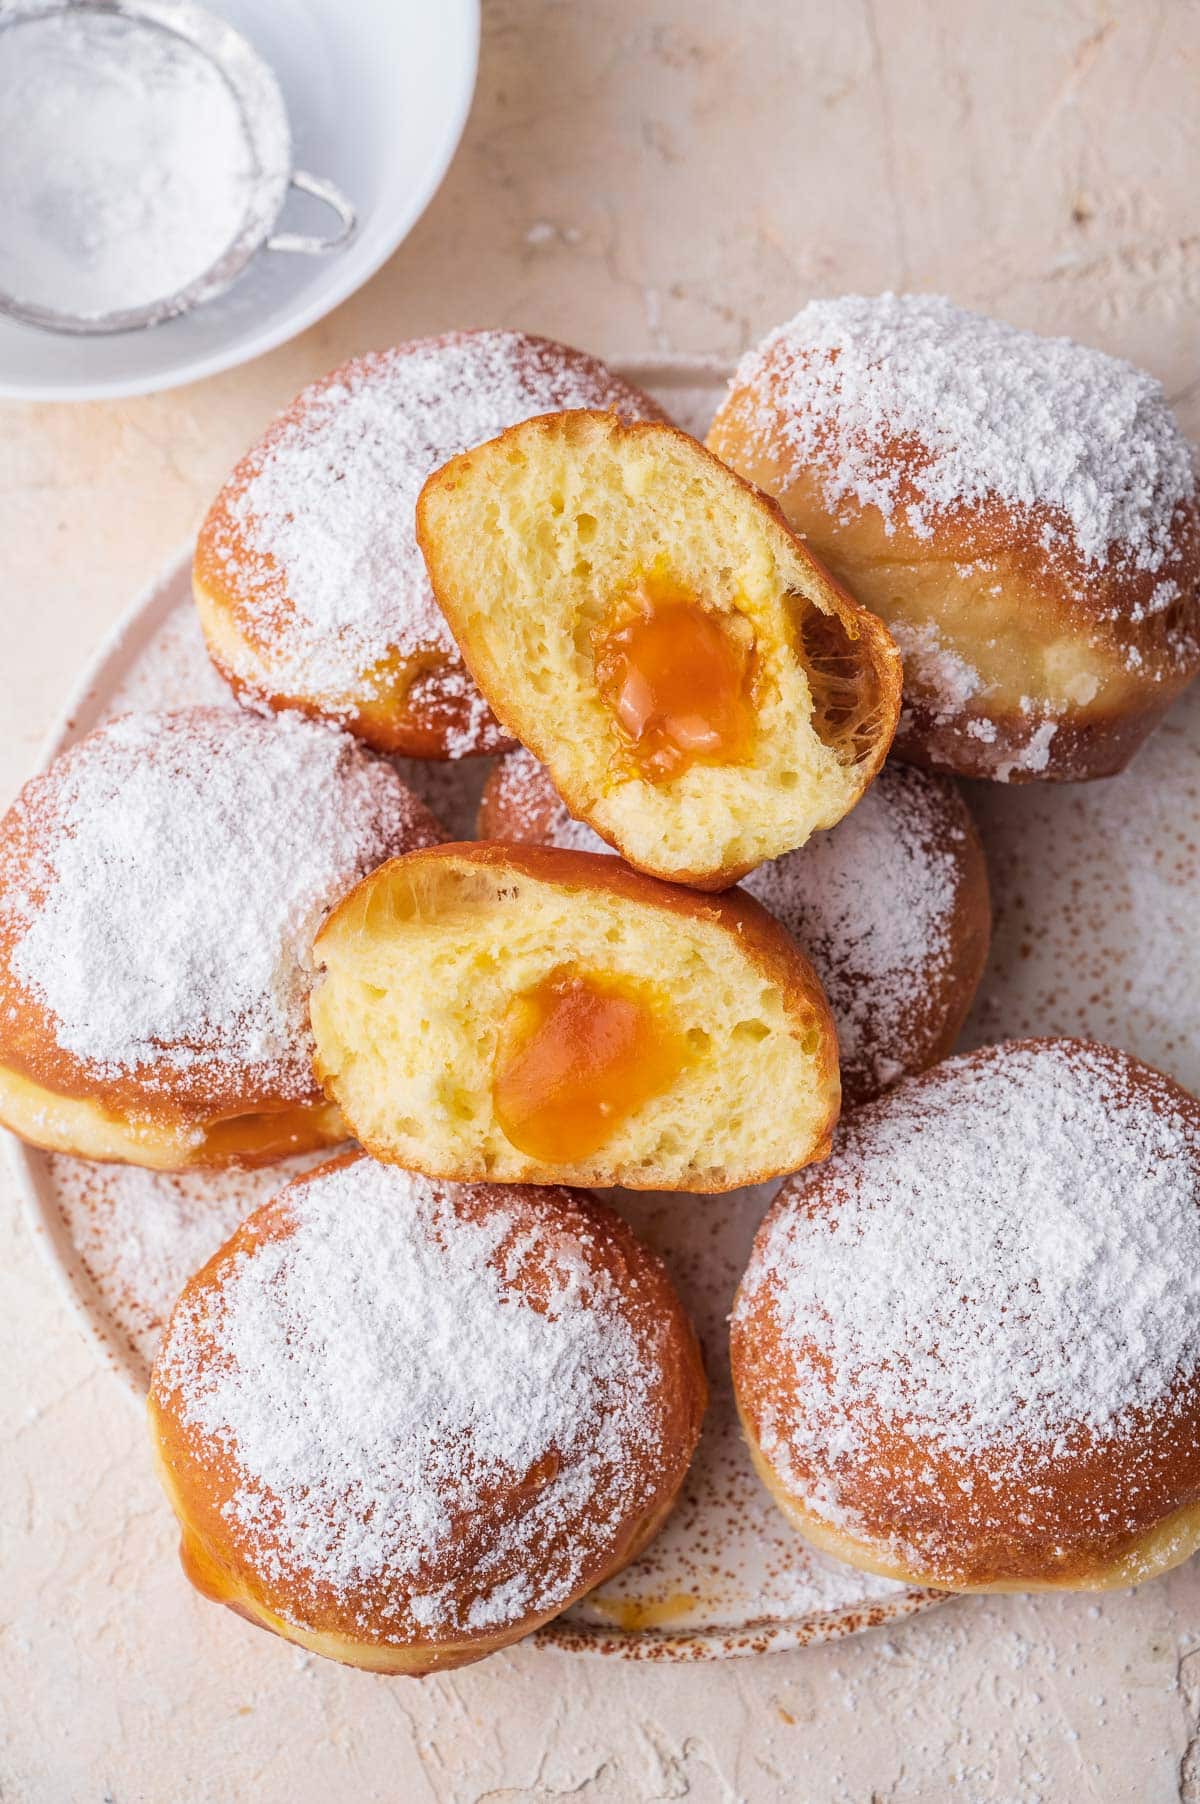
The most popular filling for Krapfen in Austria is apricot jam but other fillings such as chocolate hazelnut cream, vanilla custard filling, or eggnog filling are also very popular. They are most often dusted with powdered sugar but sometimes also glazed with icing or chocolate ganache.
Below you will find information about the ingredients and how to prepare the recipe. For the measurements and detailed instructions scroll down to the printable recipe card.
Ingredients
Here’s what you need to make Krapfen:
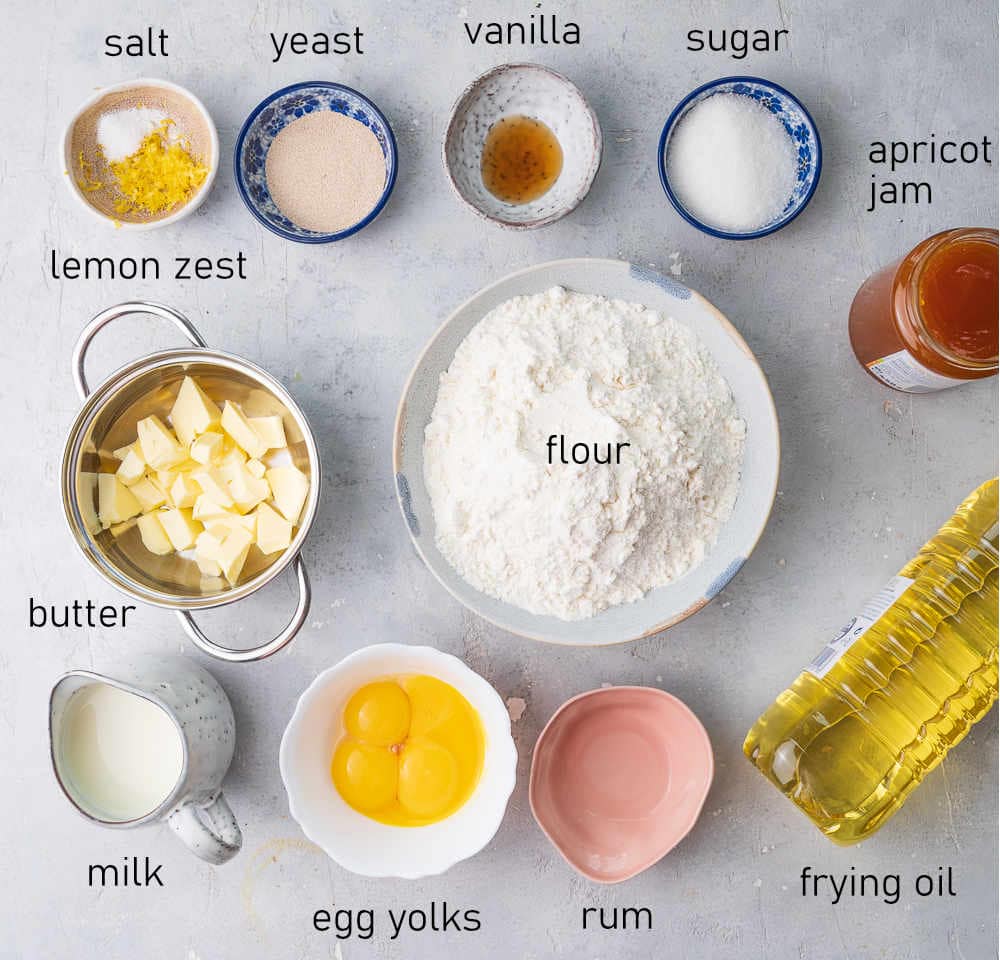
- In Austria and Germany, fresh yeast is most often used, they can be found in every grocery store. Yeast dough made with fresh yeast rises faster but the yeast flavor is more pronounced. I used instant yeast for this recipe because this type of yeast is easier to get in other countries.
- Krapfen dough is known for the use of many egg yolks, I used 4 but you can add more or less – you can use 1 medium egg instead of 2 egg yolks.
- Brandy/rum is optional – it adds flavor and helps the dough to not soak up fat (it’s not that important if you’re checking the temperature of the oil with a thermometer).
- You can use a different kind of filling for this recipe: any kind of jam that you like (preferably thick and smooth), any cream that you like (eg pastry cream), vanilla or chocolate pudding, nutella. I used apricot jam because it’s the most traditional in Austria where I live.
- Oil for frying: use high-smoke point vegetable oil (suitable for frying in high temperatures) such as canola oil or refined coconut oil.
- You may notice that there is only a small amount of sugar in the dough (resist the urge to add more!). More sugar in the Krapfen dough will cause the dough brown too quickly while frying which can cause that your Krapfen will have raw dough in the middle. Krapfen are sweeten mainly with sweet filling and generous layer of powdered sugar on top.
- From leftover egg whites you can make these chocolate-dipped coconut macaroons.
Regular readers may notice that this recipe is very similar to Polish donuts (pączki) – this is true, all types of donuts in the German-speaking countries, Poland, Ukraine (and other neighboring countries), are very similar. You can also use this paczki recipe to make Krapfen if you prefer it. What distinguishes Krapfen from paczki is just the filling (for Krapfen, apricot jam is more traditional while for paczki it’s rose or plum jam), and toppings (Krapfen are usually dusted with powdered sugar while paczki are most often glazed with icing).
How to measure flour
In the recipe card at the end of the post, I provided all possible measurements for Krapfen – by volume and by weight. I’m always using a kitchen scale to make Krapfen (and generally to develop the recipes on my website). If you’re weighing your ingredients on a scale your results will be very consistent and the same as mine. It’s really easier, quicker (you don’t have to clean all the measuring cups), and a kitchen scale is super cheap!
You can measure all the ingredients for this recipe using measuring cups but I would recommend weighing flour.
Measuring the flour with measuring cups is unfortunately very inaccurate. 1 US cup of flour can weigh from 120g-140g, depending on how you’re filling your cup (1 US cup is 240ml, a European cup is 250ml). 20g is a little over 2 tablespoons of flour, so when this recipe calls for 4 cups of flour, you could have added 8 tablespoons more flour which is 1/2 cup! This will result in dry and chewy Krapfen. Check the consistency of the dough – it should be soft and a little bit loose, it should not be dense.
If you’d like to measure flour with cups you need to:
- Fluff the flour by stirring it in the bag/flour container with a spoon.
- Spoon the flour and sprinkle it into your measuring cup.
- Sweep off the excess flour with the back of a knife.
How to make Krapfen step by step
Make the dough
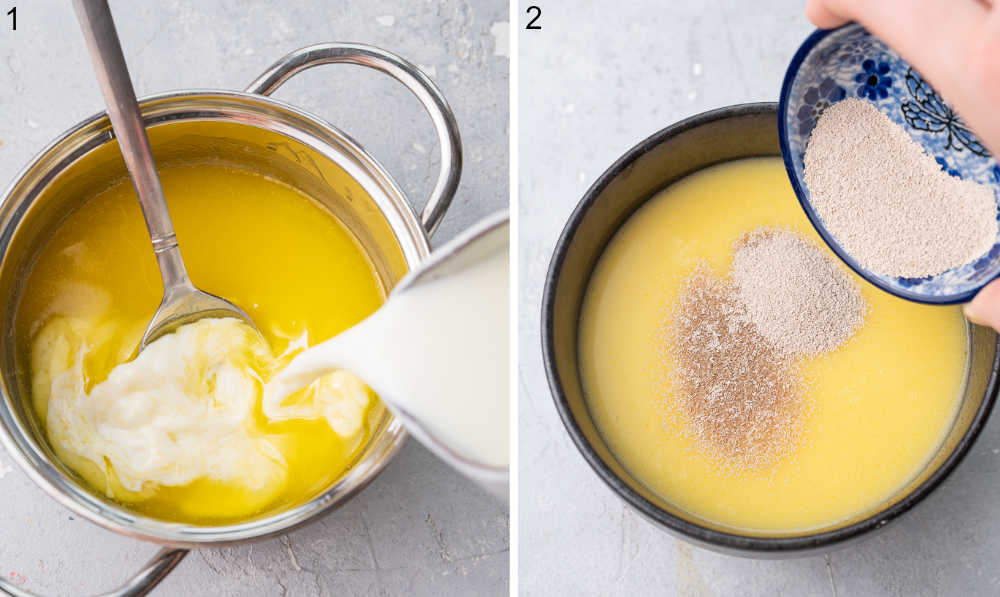
STEP 1: Add butter into a medium saucepan and heat until melted. Add the cold milk, vanilla extract, and 1 tablespoon sugar, stir until combined, then take the pot off the heat. Pour the mixture into a medium bowl, make sure the temperature of the liquid is between 100-110°F (38-43°C) (pleasantly warm to your finger).
STEP 2: Stir in the yeast (adding yeast into a warm liquid will make them rise faster). After about 1-2 minutes you should see the yeast is starting to ‘bloom’ (will be frothy/foamy).
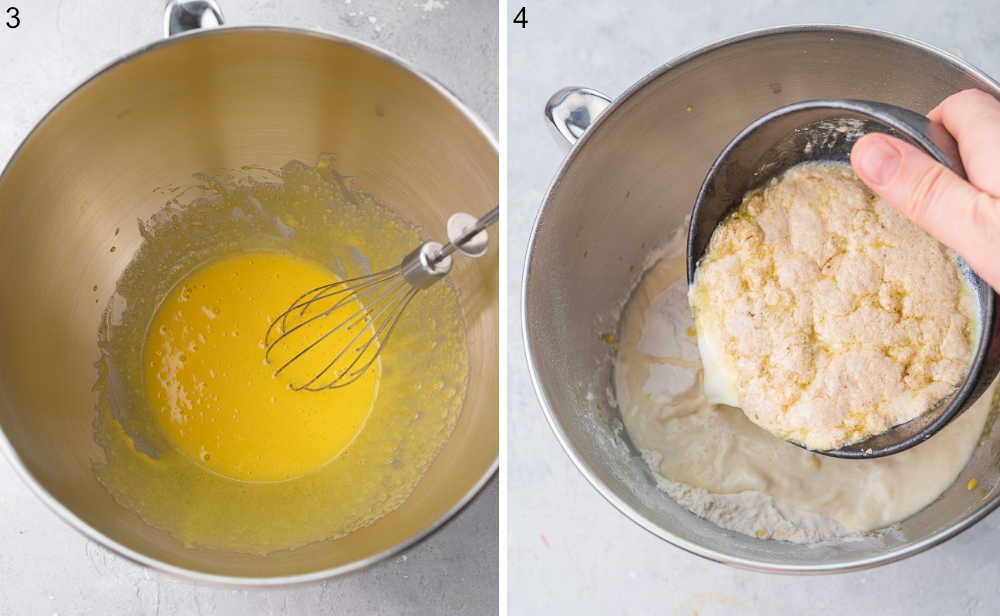
STEP 3: Add the egg yolks and the remaining sugar into a large bowl. Whisk for 1-2 minutes until fluffy.
STEP 4: Add brandy/rum, salt, lemon zest, and flour. Add the yeast mixture.
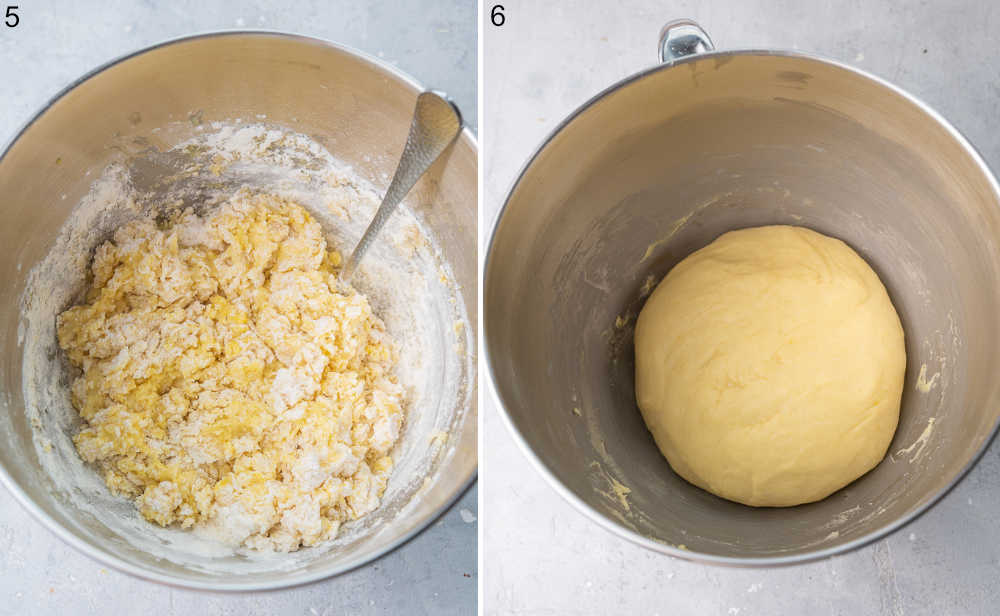
STEP 5: Stir with a spoon until roughly combined then start kneading by hand or with a stand mixer using a dough hook attachment.
STEP 6: Knead the dough until soft, elastic, and no more sticky. It will take 7 minutes on speed 2 in Kitchen Aid or about 15 minutes by hand. If kneading the dough by hand you can find the mixture too sticky, try not to add additional flour.
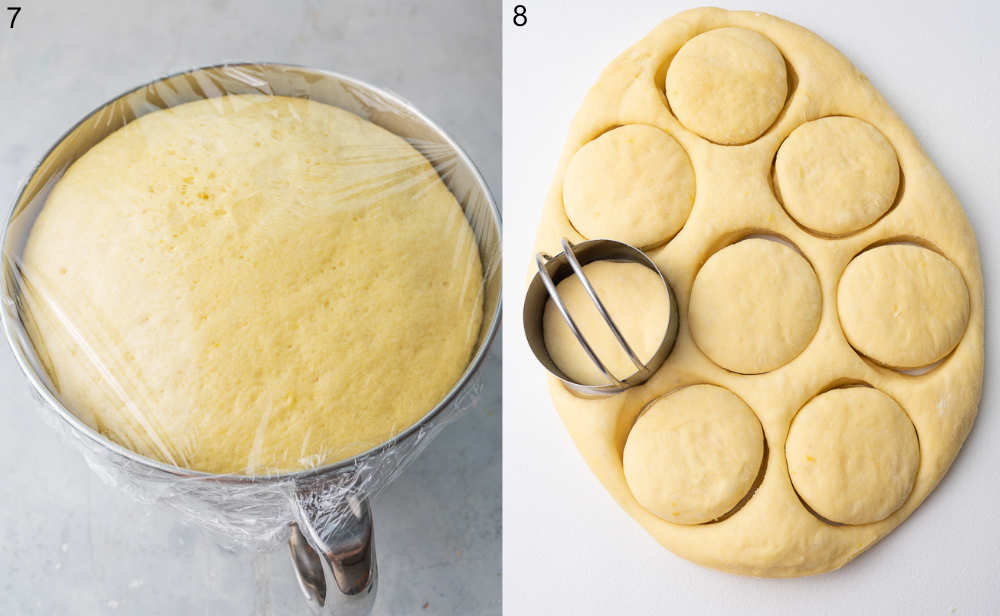
After 7 minutes of kneading with a mixer, you will see that the dough starts to clean off the sides of the bowl, it will be soft and a little bit sticky. Scrape the dough from the sides of the bowl with a spatula and knead it by hand for a minute. After this time the dough should be smooth, soft and should no longer stick to your hands. If you have used a kitchen scale to measure out the flour you can trust the recipe and use the exact amount written in the ingredient list but if you’re using measuring cups you have to assess the texture of the dough and add more flour/liquid if necessary.
Let the dough rise
STEP 7: First rise: Form a smooth dough ball, put it back in the bowl, cover the bowl tightly with plastic foil, and place in a warm place for about 1 – 1 1/2 hours or until doubled in volume (I’m putting it in a turned off oven with a light on).
STEP 8: Transfer the dough to a lightly-floured rolling mat/counter and roll it out to a thickness of 2/3 – 3/4 of an inch (1.7-1.9cm). Cut out rounds using a 2 3/4 to 3-inch biscuit cutter (I used a 2 3/4 which is 7cm). You can knead the leftover dough into a ball, roll it out, and again cut out rounds. You can also simply divide the dough into 80g-pieces, and roll each piece of dough into a ball.
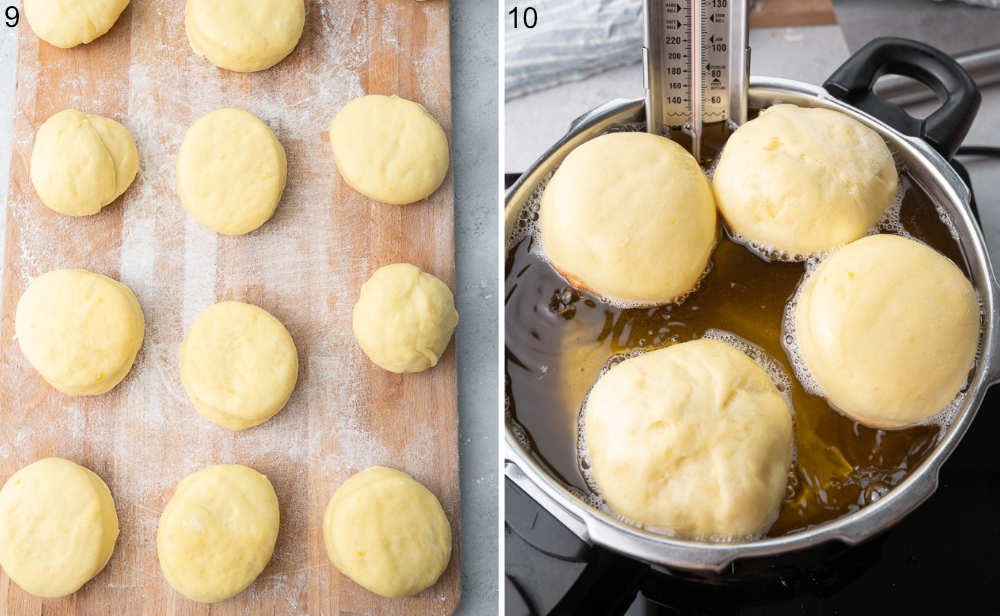
STEP 9: Second rise: Place pieces of dough on a lightly floured piece of parchment paper or a wooden board, about 2-inches (5cm) apart. Cover loosely with a clean kitchen towel. Let rise for 20-30 minutes.
Fry Krapfen
STEP 10: Fry Krapfen: Heat the oil in a large pot (preferably shallow and wide) until the temperature reaches 350°F (175°C). It’s best to use a candy thermometer which can be attached to a pot or a digital grill thermometer to check the temperature for the whole frying process (it should be 340-350°F which is 170-175°C). The amount of oil will depend on the size of the pot (I used 6 cups), you should have at least 1 1/2 inches (4cm) oil in your pot.
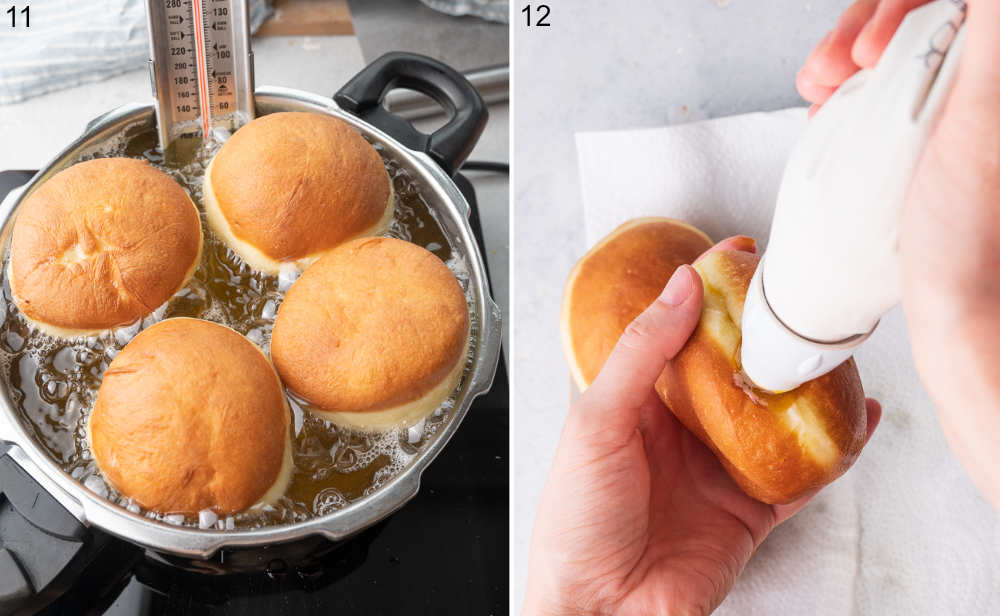
STEP 11: Fry Krapfen in batches (3-5 Krapfen, depending on the size of the pot). Gently lower the Krapfen into the oil, I like to pick them up and slide them off of a lightly floured bench scraper.
It’s important to control the temperature of the oil – if it’s too hot, Krapfen will brown too quickly and will be raw in the middle, if it’s too low, they will soak up fat and be dense and greasy. Fry Krapfen for about 2-3 minutes per side or until golden.
Transfer to a plate lined with paper towels. Let them cool down.
STEP 12: When Krapfen are cold, fill them with apricot jam using a piping bag and a long piping tip.
Dust them generously with powdered sugar.
Enjoy!
Storage
Krapfen taste best right after they have been prepared, but they will also be good for the rest of the day. They are a little bit worse the next day but still very good. I’m keeping them in the fridge. Bring them to room temperature before serving.
More Austrian/German dessert recipes you may like
- Linzer Cookies
- Marillenknödel (Austrian apricot dumplings)
- Vanillekipferl (Vanilla Crescent Cookies)
- Kaiserschmarrn
- Nut roll with chocolate (Nusskranz)
- Gingerbread squares with plum jam and chocolate (Lebkuchen cookies)
Did you make this recipe? RATE THE RECIPE or tell me in the COMMENTS how you liked it! You can also add a photo of your dish. It would make me very happy and will help other readers. Thank you!!
Krapfen – Austrian/German Jelly Donuts
Ingredients
for the doughnuts:
- 6 tablespoons butter 85g
- 1 cup milk 240g
- 1/4 cup sugar 50g
- 2 teaspoons vanilla extract
- 1 tablespoon + 1 teaspoon instant yeast 11g
- 4 large egg yolks
- 1 tablespoon brandy or rum optional
- zest grated from 1/2 lemon
- 1/2 teaspoon salt
- 4 cups flour (500g) spooned and leveled not scooped
additionally:
- 4-6 cups frying oil
- 1 cup apricot jam preferably thick and smooth
- powdered sugar for dusting
Would you like to save this?
Instructions
- Make the dough: Add butter into a medium saucepan and heat until melted. Add the cold milk, vanilla extract, and 1 tablespoon sugar, stir until combined, then take the pot off the heat. Pour the mixture into a medium bowl, make sure the temperature of the liquid is between 100-110°F (38-43°C) (pleasantly warm to your finger) then stir in the yeast (adding yeast into a warm liquid will make them rise faster). After about 1-2 minutes you should see the yeast is starting to 'bloom' (will be frothy/foamy).
- Add the egg yolks and the remaining sugar into a large bowl. Whisk for 1-2 minutes until fluffy. Add brandy/rum, salt, lemon zest, and flour. Add the yeast mixture.
- Stir with a spoon until roughly combined then start kneading by hand or with a stand mixer using a dough hook attachment. Knead the dough until soft, elastic, and no more sticky. It will take 7 minutes on speed 2 in Kitchen Aid or about 15 minutes by hand. If kneading the dough by hand you can find the mixture too sticky, try not to add additional flour.
- After 7 minutes of kneading with a mixer, you will see that the dough starts to clean off the sides of the bowl, it will be soft and a little bit sticky. Scrape the dough from the sides of the bowl with a spatula and knead it by hand for a minute. After this time the dough should be smooth, soft and should no longer stick to your hands. If you have used a kitchen scale to measure out the flour you can trust the recipe and use the exact amount written in the ingredient list but if you’re using measuring cups you have to assess the texture of the dough and add more flour/liquid if necessary.
- First rise: Form a smooth dough ball, put it back in the bowl, cover the bowl tightly with plastic foil, and place in a warm place for about 1 – 1 1/2 hours or until doubled in volume (I'm putting it in a turned off oven with a light on).
- Transfer the dough to a lightly-floured rolling mat/counter and roll it out to a thickness of 2/3 – 3/4 of an inch (1.7-1.9cm). Cut out rounds using a 2 3/4 to 3-inch biscuit cutter (I used a 2 3/4 which is 7cm). You can knead the leftover dough into a ball, roll it out, and again cut out rounds. You can also simply divide the dough into 70-80g pieces, and roll each piece of dough into a ball.
- Second rise: Place pieces of dough on a lightly floured piece of parchment paper or a wooden board, about 2-inches (5cm) apart. Cover loosely with a clean kitchen towel. Let rise for 20-30 minutes.
- Fry Krapfen: Heat the oil in a large pot (preferably shallow and wide) until the temperature reaches 350°F (175°C). It's best to use a candy thermometer which can be attached to a pot or a digital grill thermometer to check the temperature for the whole frying process (it should be 340-350°F which is 170-175°C). The amount of oil will depend on the size of the pot (I used 6 cups), you should have at least 1 1/2 inches (4cm) oil in your pot.
- Fry Krapfen in batches (3-5 Krapfen, depending on the size of the pot). Gently lower the Krapfen into the oil, I like to pick them up and slide them off of a lightly floured bench scraper.
- It’s important to control the temperature of the oil – if it’s too hot, Krapfen will brown too quickly and will be raw in the middle, if it’s too low, they will soak up fat and be dense and greasy. Fry Krapfen for about 2-3 minutes per side or until golden.
- Transfer to a plate lined with paper towels. Let them cool down.
- When Krapfen are cold, fill them with apricot jam using a piping bag and a long piping tip.
- Dust them generously with powdered sugar.
- Enjoy!
Notes
- You can use a different kind of filling for this recipe: any kind of thick jam that you like, any cream that you like (eg pastry cream), vanilla or chocolate pudding, nutella. My favorite filling for Krapfen is either apricot jam or vanilla pudding.
- How to measure flour: I’m using the “spoon and level method” so 1 cup of flour in my recipes weighs 125g. Fluff the flour by stirring it in the bag/flour container with a spoon. Spoon the flour and sprinkle it into your measuring cup. Sweep off the excess flour with the back of a knife. Use a digital scale for measuring flour for perfect and consistent results!
- Calories = 1 Krapfen (1/14 of the recipe). This is only an estimate!



2 Comments
Bryan Gogal
20 March 2024 at 12:55Very nice recipe and well written – very clear instructions. Terrific photos also!
Aleksandra
21 March 2024 at 05:37thank you! I’m glad you liked it!