
Vanillekipferl are Austrian/German vanilla crescent cookies. They are deliciously buttery, nutty, and they literally melt in your mouth (that’s what they’re famous for!). I’m sure they will be a hit at your holiday table! These delicious nut cookies are flavored with vanilla and dusted with vanilla sugar (I’m providing substitutions if you can’t find vanilla sugar). We are making them for Christmas every year!

What are Vanillekipferl?
Vanillekipferl are Austrian / German Christmas cookies. They are also popular in Croatia, Slovakia, Czech Republic, and Hungary. Their name means vanilla crescents in the German language.
History of Vanillekipferl
The history of Vanillekipferl is not exactly clear. According to a famous legend, they were invented by Viennese bakers, who, in order to celebrate the victory of Jan III Sobieski over the Turkish army in 1683 and their exile from Vienna, decided to create a baked good that resembled the moon shape from the Turkish flag.
This legend, although very popular, is not entirely true. Crescent-shaped baked goods (not cookies) were already popular in these regions in the 13th century and they were also a precursor to the famous French croissant (!). Apparently, crescent-shaped baked goods were presented to the French by Marie Antoinette, the daughter of the Austrian Duchess Maria Theresa, who married a Frenchman and took Kipferl with her when she moved to France.
In Austria and the neighboring regions, Vanillekipferl became popular only in the 19th century, when artificial vanilla was discovered and the cost of making cookies has dropped significantly and became available to ‘ordinary’ people, not just aristocrats.
Nowadays, In Viennese bakeries, crescent-shaped pastries are very popular, not just the cookies but also for example brioche buns (Briochekipferl), which are available all year round.
Ingredients
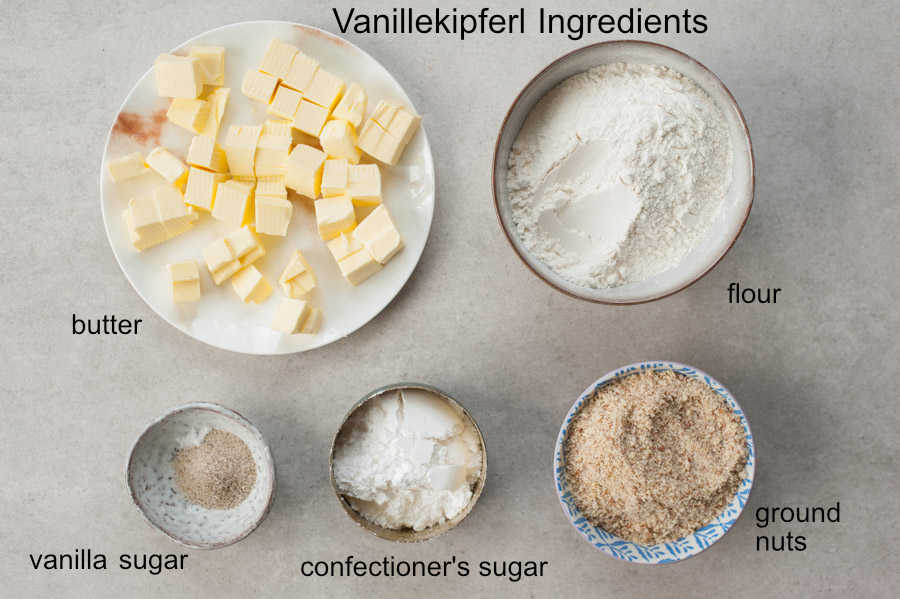
Vanillekipferl recipe is really simple – it requires just 4 main ingredients: ground nuts, flour, sugar, and butter.
- Ground nuts – almonds and walnuts are most often used but I’ve also seen recipes with hazelnuts. I tested this recipe with skin-on almonds, peeled toasted almonds, walnuts, and hazelnuts. I liked the version with skin-on almonds and walnuts the most. You can buy ground almonds (make sure they smell nice and are not stale) or grind them yourself (use a food processor, but don’t pulse too much or you will make almond butter).
- Butter – use good quality unsalted butter, preferably European-style butter. These cookies are made with only a few ingredients so you can really taste the difference.
- Vanilla sugar – vanilla crescent cookies are traditionally made with vanilla sugar. Vanilla sugar is granulated sugar flavored with vanilla beans. It’s commonly available in any grocery store in Germany/Austria and almost all recipes for baked goods from these countries are calling for vanilla sugar and not vanilla extract. It’s added to the dough and it’s used to dust the baked cookies. Many recipes will tell you that you either must buy vanilla sugar or make it yourself, but I tested this recipe with vanilla extract which is more available in some countries than vanilla sugar, and they tasted just the same. If you would like to make your own vanilla sugar though, it’s actually very simple – you just need to combine vanilla bean seeds with granulated or powdered sugar.
- Flour – I used all-purpose flour.
- Powdered sugar.
- You can find recipes calling for eggs or egg yolks, but I’m using neither. When researching old Austrian cookbooks I haven’t seen any recipes calling for eggs or egg yolks. The dough made with eggs it’s easier to work with but the cookies come out more tough. Remember, Vanillekipferl must MELT in your mouth!
- Equipment needed: you don’t need any equipment to make this recipe but there are Vanillekipferl baking sheets that you can use. They are not necessary but the cookies made using such baking sheets are not spreading that much. I personally haven’t used them.
Step by step instructions
These cookies are made with just 5 ingredients and are so simple. In a nutshell, you just have to knead the dough from all the ingredients, shape the crescents and bake.
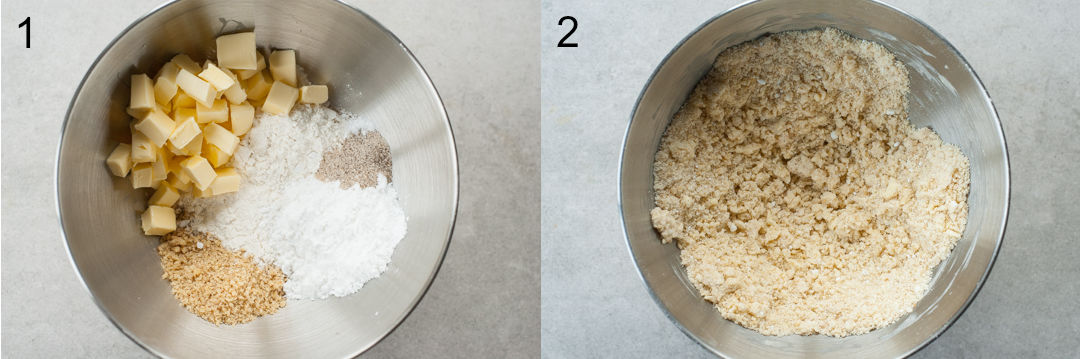
STEP 1 (photos 1+2): Make the dough:
Add all the ingredients for the cookies to a big bowl. Rub the butter with the other ingredients with your fingers, then work it with your palms (you can also use a pastry cutter). The dough will be very crumbly at first, but a minute later or so it will come together.
The dough can also be kneaded with a stand mixer fitted with a paddle attachment – mix at the lowest speed until smooth dough forms.
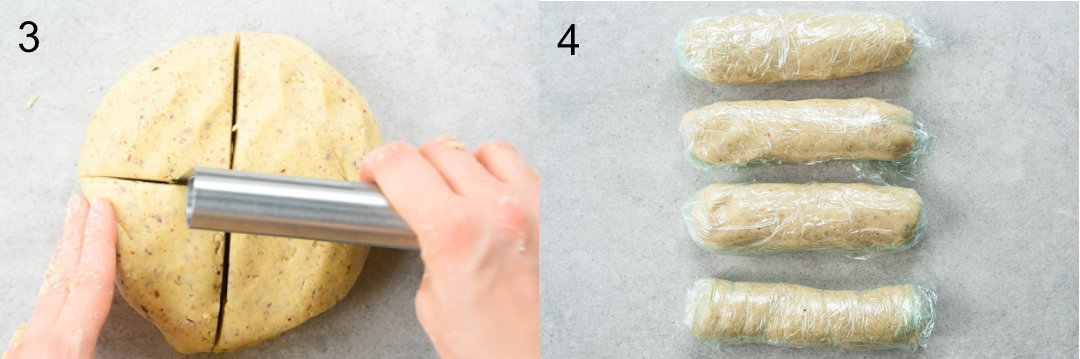
STEP 3: You should have a smooth ball of dough. Divide the dough into 4 parts.
STEP 4: Chill the dough: Roll each part into a log. Wrap each log in plastic foil and put it in the fridge for at least 1 hour (or longer).
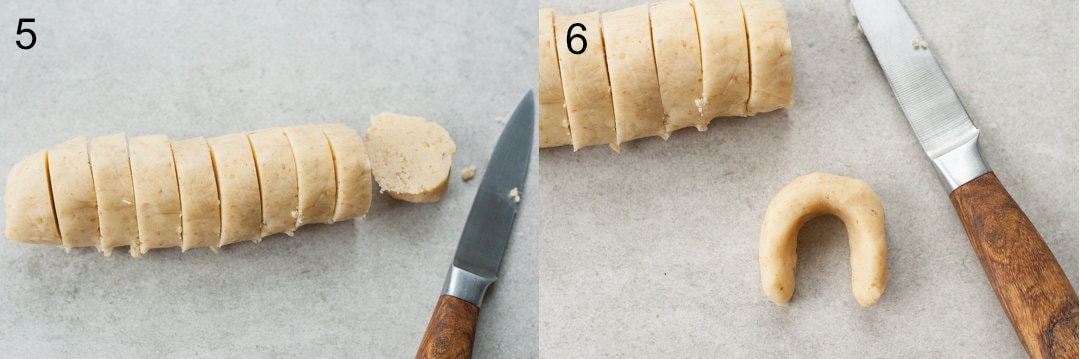
STEP 5 (photos 5+6): Shape the crescents:
Take one log out of the fridge and cut it into 1/2-inch (1 cm) slices. If the dough is cold, shape the cookies with your fingers until they resemble a crescent. If the dough is more warm you can try to roll the slice of the dough between your palms until it forms a cylinder and then bend each end into a crescent shape. Repeat with the remaining dough.
The shape of the cookies: make sure the dough is not too thick (the cookies will spread in the oven )and that the tips of the cookies are a little bit thinner than the middle part.
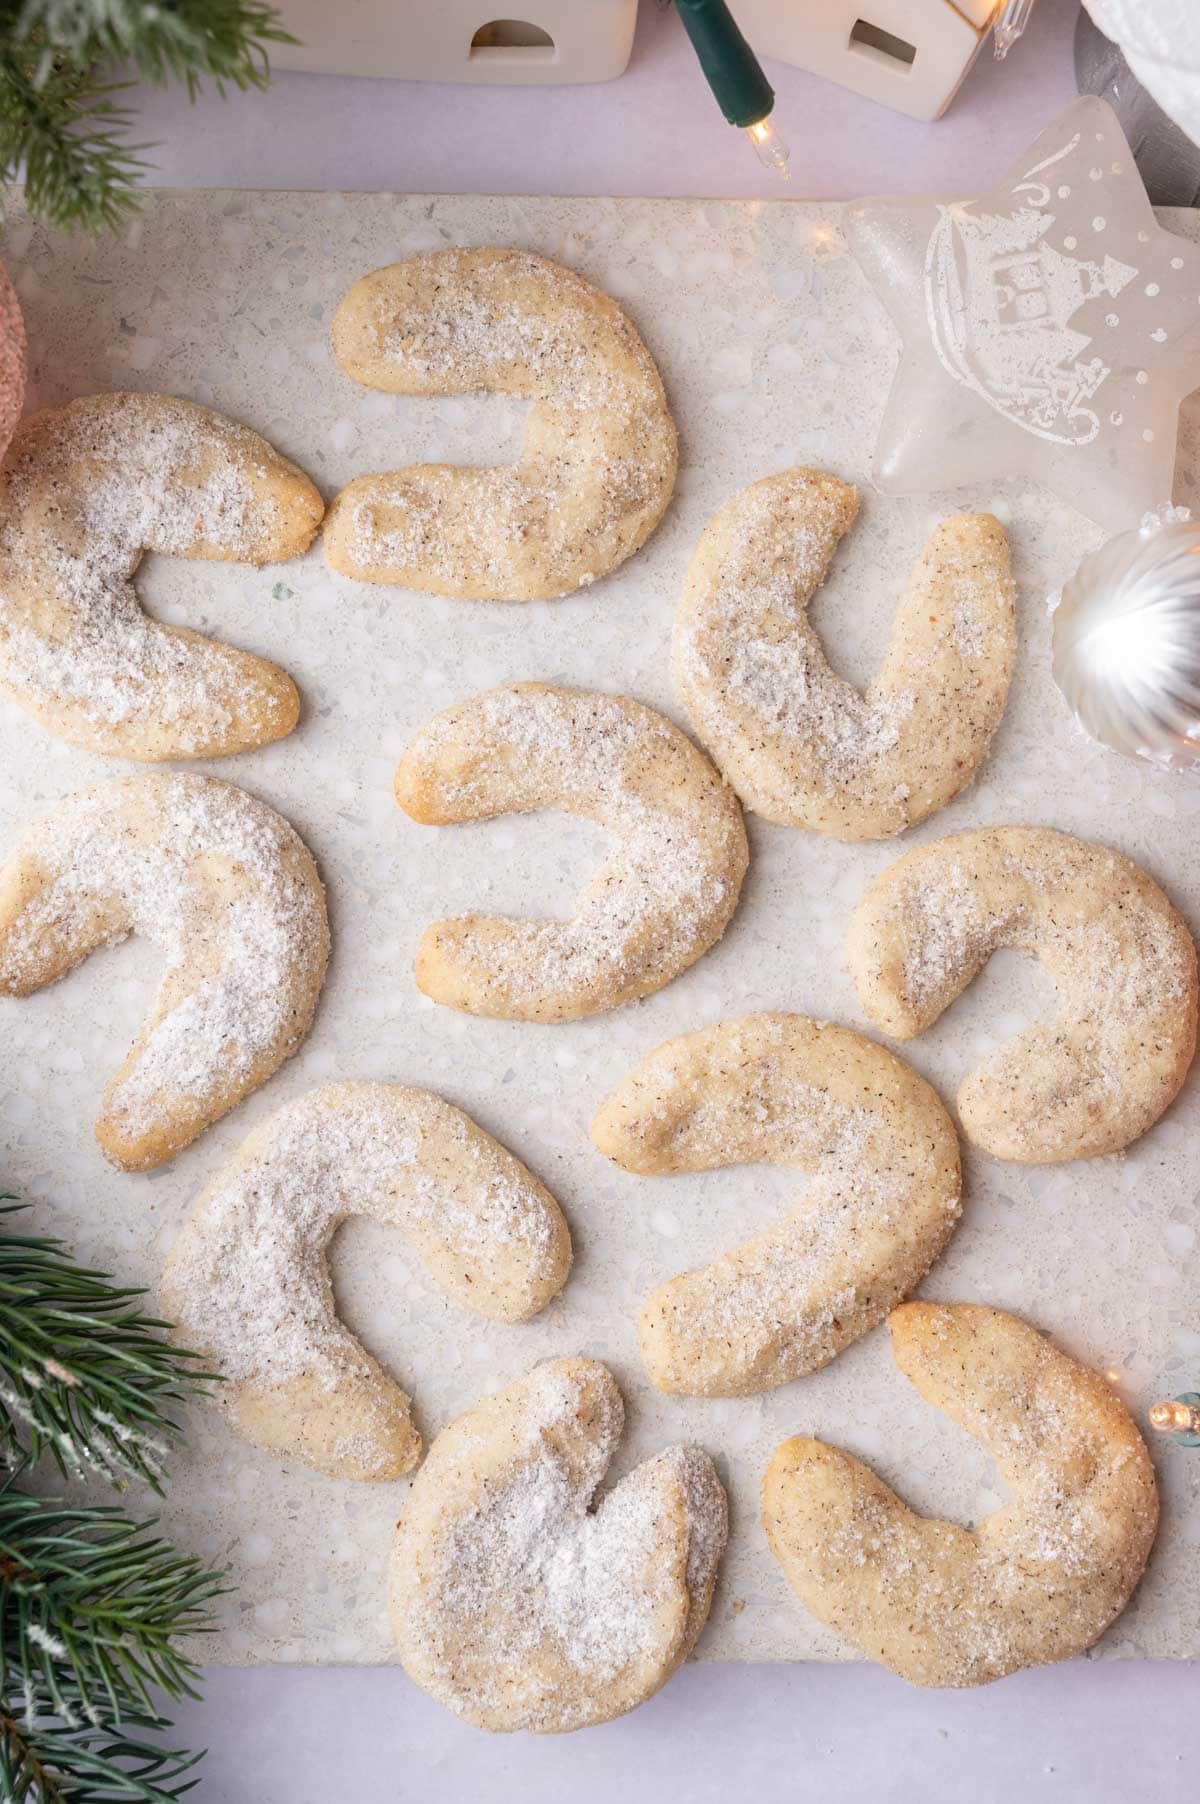
STEP 6: Bake the cookies: Place the cookies apart (they will spread a little) on a baking tray lined with baking paper.
Bake the cookies for 10 minutes at 350°F (180°C / Gas Mark 4, no fan). They should be pale and only the tips of the crescents should be lightly golden, the cookies will be completely soft (they will continue baking on the baking sheet).
The baking time may vary depending on the oven! When I baked them for 11 minutes, they were also good but just slightly crunchy, so 10 minutes is better since they have to MELT in your mouth!
Bake the cookies in batches.
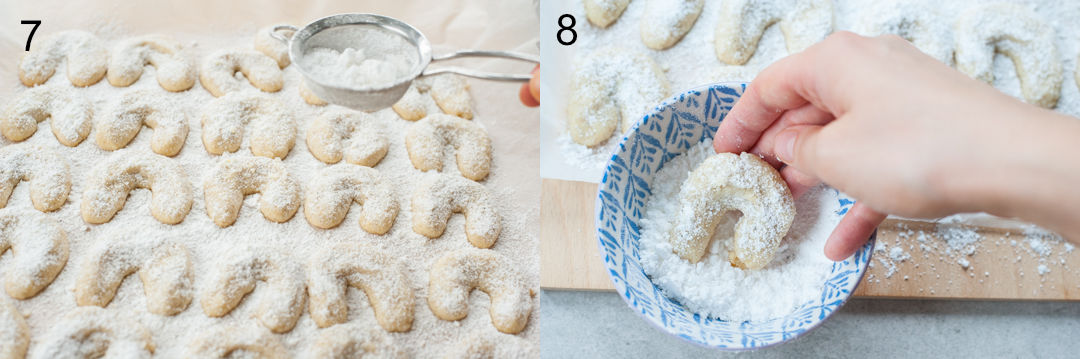
STEP 7 (photos 7+8): Coat the cookies in vanilla sugar: In a food processor, mix powdered sugar and vanilla sugar until very fine. This way you will make powdered vanilla sugar that will stick much better to the cookies than granulated vanilla sugar.
You can also just combine powdered sugar with vanilla sugar but I find it doesn´t stick to the cookies as well as powdered vanilla sugar.
If you don’t have vanilla sugar: scrape out the seeds out of a 1/2 vanilla pod, add to a food processor along with 1/4 cup of sugar, and blitz until well-combined and pulverized.
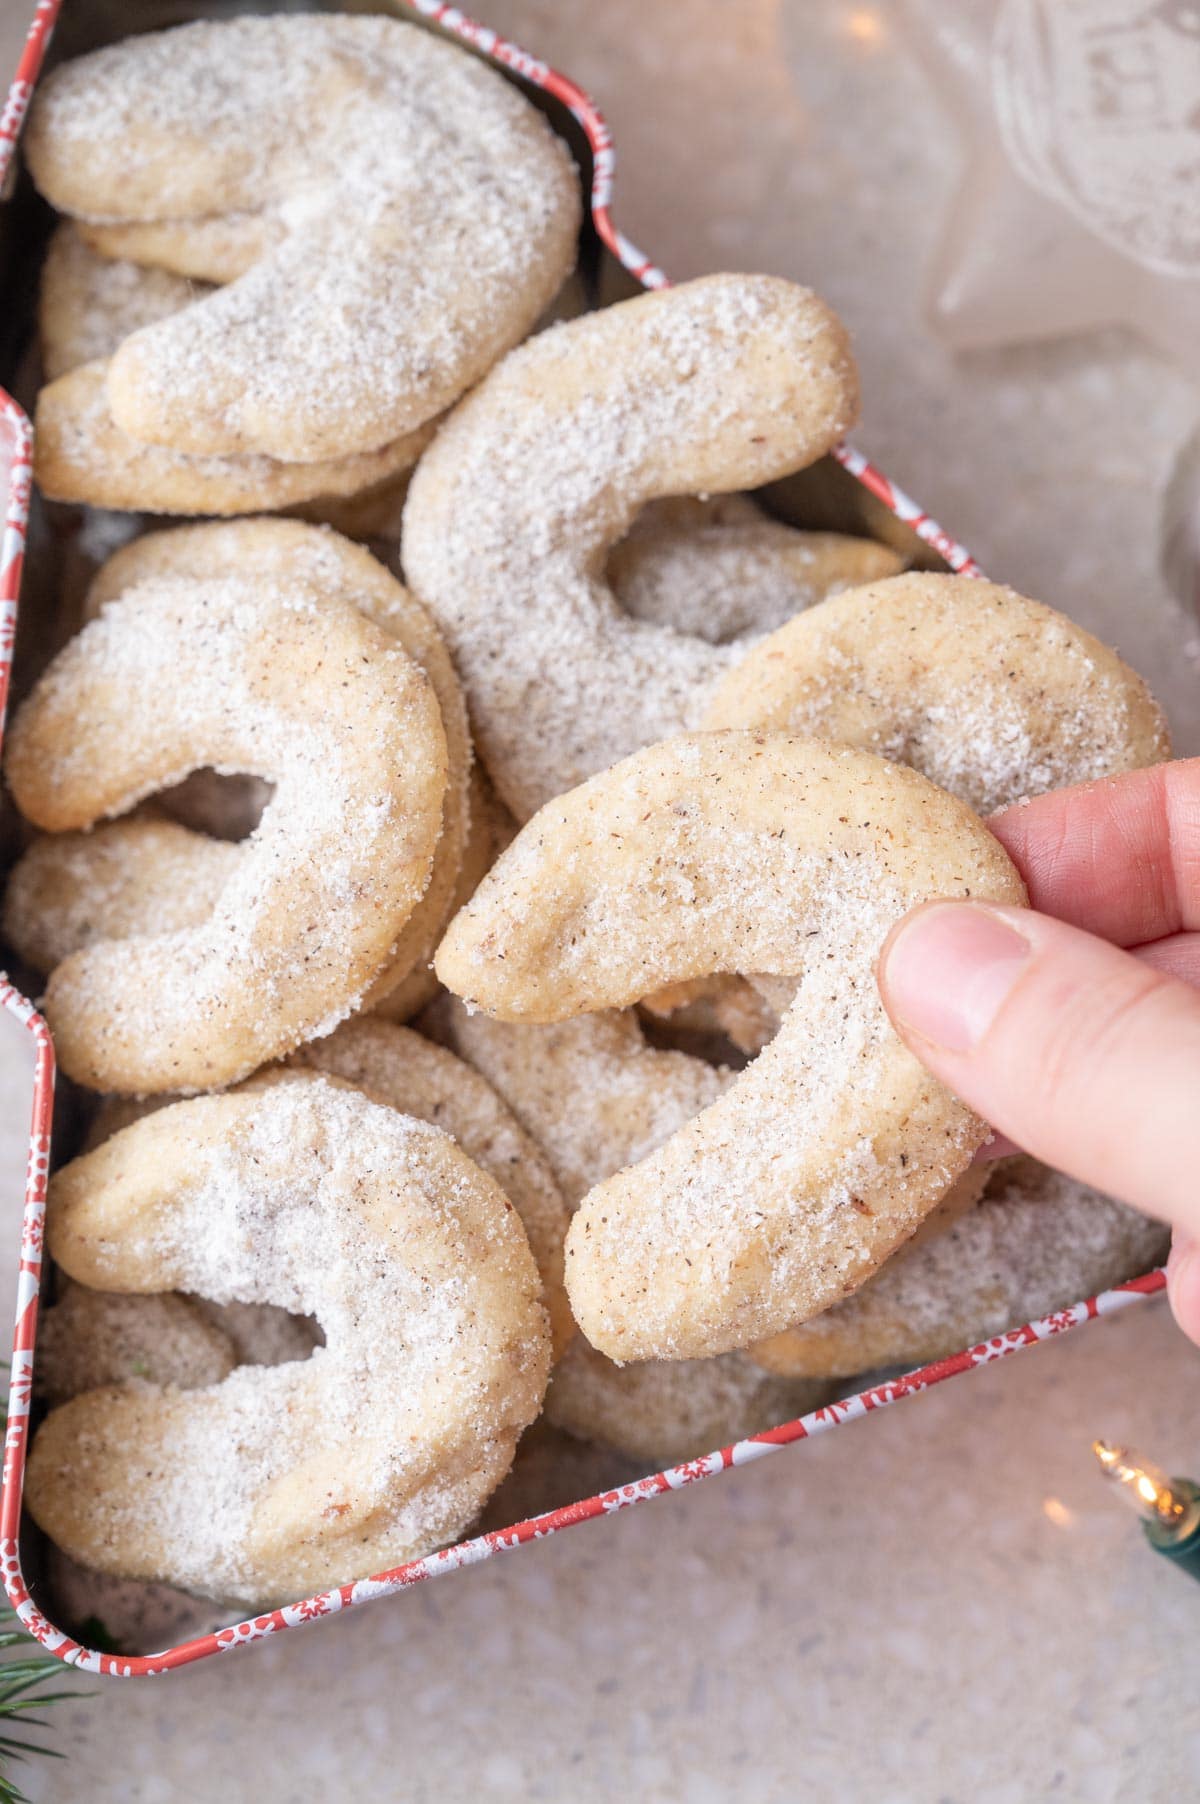
Coat the cookies with vanilla sugar: Sprinkle the (hot) cookies with sifted powdered vanilla sugar (when the cookies are cold, the sugar won’t stick to them). When the cookies are firm enough to handle take each cookie and dip it in the vanilla sugar.
Leave the cookies to cool completely.
Enjoy!
Top tips + why this recipe works
- The best (and authentic) vanilla crescent cookies are made with no eggs, egg yolks, or baking powder.
- The cookies are flavored with vanilla on the inside and on the outside (double-delicious).
- When shaping the crescents the dough will be a little crumbly but this is how it should be (remember the cookies will reward you with their delicate texture!). If it´s too difficult to work with, let the dough warm up a bit in room temperature.
- Let the dough rest in the fridge, this step can not be omitted!
- The dough is quite easy to work with after it has been made so I tried baking these cookies right after making the dough. I also tried shaping the cookies, then chilling shaped cookies in the fridge for 30 minutes and then baking them. Both of these methods work but the cookies are NOT as good as when the dough is chilled for 1 hour and THEN shaped. These cookies have the best texture and melt in your mouth! If you´re short on time though, the best would be to shape the cookies right after making the dough, chilling them in the fridge (on a baking sheet) for 30 minutes then baking them.
- Keep the dough cold at all times. When shaping the cookies, take only 1 log out of the fridge at a time.
- Try to make the cookies the same size so that they bake evenly.
- Don’t bake the cookies for too long. They will not look ready when you take them out of the oven. They should be pale and soft, only their edges may be a little golden.
- Dusting the cookies works best. They are just too fragile to dip them in vanilla sugar while warm and if you wait for them to cool down, the sugar won’t stick to them very well.
- Don´t shape thick crescents – they should be thin!
Storage
- These cookies can be stored in a tightly-closed cookie tin for up to 3 weeks (if they last that long).
- The recipe tells you to chill the dough in the fridge for 1 hour but you can keep it there longer and bake the cookies even the next day or in 2 days. Just leave it on the counter for 15 minutes to warm it up before shaping the cookies.
Other Austrian recipes you may like
- Gingerbread squares with plum jam and chocolate (Lebkuchen cookies)
- Paprika cheese spread (Liptauer)
- Pumpkin seed crusted chicken salad (Backhendlsalat)
- Fluffy torn pancake with caramelized plum and cranberry sauce (Kaiserschmarrn)
- Cranberry Orange Mulled Wine Recipe (Glühwein)
This recipe is adapted from an old Austrian cookbook from 1970, the author is S.Behring. I changed the ingredient ratios (only slightly) to adjust them to the US measurements. I also added vanilla sugar to the dough (the recipe was calling for vanilla sugar only on the outside).
Did you make this recipe? RATE THE RECIPE or tell me in the COMMENTS how you liked it! You can also add a photo of your dish. It would make me very happy and will help other readers. Thank you!!
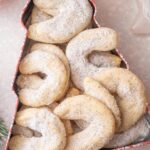
Vanillekipferl (Vanilla Crescent Cookies) + video
Ingredients
cookies:
- 1 ¼ cups (125g) ground almonds or walnuts/hazelnuts
- 8 oz (225g) butter cold and cut into small cubes
- 2 ¼ cups (280g) flour spooned and leveled, not scooped
- 1 cup (120g) powdered sugar 120g
- 2 tablespoons vanilla sugar OR 1 tablespoon vanilla extract + 1 tablespoon flour
- pinch of salt
for dusting the cookies:
- ⅓ cup (40g) powdered sugar
- 2 tablespoons vanilla sugar OR 1/2 vanilla pod + 1/4 cup (50g) granulated sugar
Would you like to save this?
Instructions
- Make the dough: Add all the ingredients for the cookies to a big bowl. Rub the butter with the other ingredients with your fingers, then work it with your palms (you can also use a pastry cutter). The dough will be very crumbly at first, but a minute later or so it will come together. You should have a smooth ball of dough. The dough can also be kneaded with a stand mixer fitted with a paddle attachment – mix at the lowest speed until smooth dough forms.
- Chill the dough: Divide the dough into 4 parts, roll each part into a log. Wrap each log in plastic foil and put it in the fridge for at least 1 hour (or longer).
- Preheat the oven to 350°F (180°C / Gas Mark 4, no fan).
- Shape the crescents: Take one log out of the fridge and cut it into 1/2-inch (1 cm) slices. If the dough is cold, shape the cookies with your fingers until they resemble a crescent. If the dough is more warm you can try to roll the slice of the dough between your palms until it forms a cylinder and then bend each end into a crescent shape. Repeat with the remaining dough.
- Place the cookies apart (they will spread a little) on a baking tray lined with baking paper. Bake in batches.
- Bake the cookies for 10 minutes. They should be pale and only the tips of the crescents should be just lightly golden, the cookies will be completely soft.The baking time is very important – it may vary depending on the oven (every oven bakes a little bit differently). Make sure to not overbake them – they will lose their 'melt-in-your-mouth' feature.
- While the cookies are baking prepare vanilla sugar: In a food processor, mix powdered sugar and vanilla sugar until very fine. This way you will make powdered vanilla sugar that will stick much better to the cookies than granulated vanilla sugar.You can also just combine powdered sugar with vanilla sugar but I find it doesn´t stick to the cookies as well as powdered vanilla sugar.If you don't have vanilla sugar: scrape out the seeds out of a 1/2 vanilla pod, add to a food processor along with 1/4 cup of sugar, and blitz until well-combined and pulverized.
- When the cookies are done, transfer them GENTLY with parchment paper to a cooling rack.
- Coat the cookies with vanilla sugar: Sprinkle hot cookies with sifted powdered vanilla sugar (when the cookies are cold, the sugar won't stick to them). When the cookies are firm enough to handle take each cookie and dip in vanilla sugar.
- Leave the cookies to cool completely.
- Enjoy!
Notes
- Ground nuts – I used skin-on ground almonds nuts. I like almonds and walnuts the most. You can also grind the nuts yourself in a food processor – you don’t want them too coarse and also you can’t pulse them too much or you’ll get a nut butter.
- When shaping the crescents, the dough will be a little crumbly but this is how it should be (remember the cookies will reward you with their delicate texture!). If you have left them in the fridge longer than 1 hour leave them on the counter to warm up a little. The dough should be cold but not super hard.
- Try to make the cookies the same size so that they bake evenly.
- Store the cookies in a tightly closed cookie tin for up to 3 weeks.
- Calories count = 1 cookie (1/60 of the recipe). This is only an estimate!


4 Comments
Nicola T.
17 December 2023 at 20:11I’ve been making these since I was a child, using my mother’s recipe (parents were both Austrian). They are a Christmas tradition in our family. Our recipe did not call for any eggs either, so glad to see you omitted them. A couple of points though:
• We always use filberts (hazelnuts), and *so* prefer that to almonds – never even thought to use walnuts
• I just use plain granulated sugar for the cookies – works fine, and dip them in vanilla sugar when they’re cool. Vanilla sugar: I have a large jar of powdered sugar that I’ve had on the go for decades. I add vanilla beans to it every year. I can see adding vanilla to the cookie dough sugar, in my experience, it doesn’t need to be powdered
• MOST IMPORTANT OF ALL: Use UNSALTED butter. Add salt to taste
Aleksandra
17 December 2023 at 20:49thank you for the tips!
Melonie
21 December 2021 at 00:43Is there a reason you can’t use almond flour instead of going them yourself?
Aleksandra
21 December 2021 at 06:53Yes, you can use almond flour, but measure it by weight not by volume because it won’t be the same as ground nuts. I used store-bought ground nuts, no need to grind them yourself.